Then one day I was looking through the IKEA hackers site and found a post about how someone used laminate flooring on the back of a Pax wardrobe to create a room divider.
 |
| Inspiration from Ikea Hackers |
This was the perfect solution to my problem, but I didn't want to spend a lot of money to achieve it. I was walking through the "As-Is" section of Ikea one day found packages of the Slatten line of laminate flooring marked at $5 a package. Apparently the Slatten line of laminate flooring was horrible as flooring and they were clearancing out their stock. I bought two packages and got my husband to working (you will notice that my husband is very supportive of my creative exploits and usually performs the part of the job that involves power tools.)
I emptied the Expedit, and laid it on the carpet. Then my husband laid out the flooring and secured the boards with finishing nails. You may wonder why we used finishing nails instead of adhesive and the simple answer is we needed to take the unit apart one day. The color of the flooring was light brown and probably would have gone with the color scheme of the room, but I wanted to put a little more pizzazz to the wall. I found a pin on Pinterest where someone did a painted wall paper technique pattern on a wall. I was itching to try to technique but wasn't brave enough to paint it on an actual wall in my house. I thought it wasn't too much risk to use the technique for my partition though.
 |
| Pinned Here, Orinigal Post |
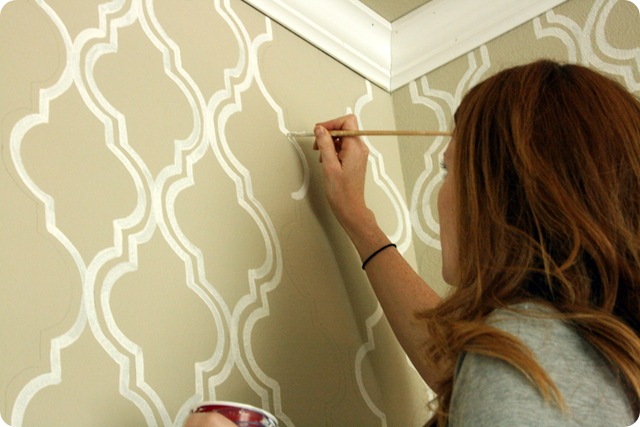
I painted the flooring the same color as the walls in my room (Liberty Blue by Behr) and bought some silver paint by Marth Stewart at Home Depot. I downloaded the template from the Jones Design Company website and got to tracing with a pencil.
 |
| Me tracing the template |
You can see the unevenness of the brush stroke and the general sloppiness of my tracing. I got better towards the end so I should have started on the edge by the wall.

I texted a picture of it to my husband and he thought it looked awesome. I was afraid when he came home that he would look closely and pick out the less than perfect parts (because he's a perfectionist like that.) But he said that if you look at the overall affect it doesn't look too bad. I have to agree with him and now when I look at the all, I try to look at it as a whole and not too closely. It looks like how Cher describes a Monet in Clueless.
 |
| My finished wall |
- $10 for two packages of Slatten flooring from Ikea
- $8 for the tub of Martha Stewart brand paint
- $2 for a paint brush from Michaels
- $0 for finishing nails (left over from another project)
- $0 Expedit (already existing)
- $0 Liberty Blue Behr Paint (left over paint from painting my room)
- Total cost for Expedit room divider = $20
No comments:
Post a Comment